Showing posts with label road rash. Show all posts

Thursday, January 6, 2011

Leather Cleaning -- at Home!

.
Now that winter has set in on most of us, it is a good time to consider cleaning up the bike and accessories for spring riding. One of those accessories is your riding outfit. You do wear more than just a pair of jeans and a fashion jacket, right?  I'm not talking about those.  I'm talking about real motorcycle protective gear. 

I always ride in a leather suit, but my suits are not new ones.  I have scrounged them from pawn shops and on-line auction sites, so they were not all pristine when I got them.  In addition, I have put on about 23,000 miles in the three years I have been riding, so the suits have seen year-round conditions including rain, road dirt, bug splats, ...and an unexpected taste of mud on the berm of a road. 

Here is an article I wrote about cleaning leather at home that appeared in a local Greenville South Carolina magazine called Motorcycle Lifestyle.  The magazine publisher, Norm Blore, is an accomplished motorcyclist and graphic artist.  His magazine was one of my favorites, but, alas, it succumbed due to a lack of advertisers in the flagging economy, though a few issues can still be seen online at the link above. 

Edit October 2012: The recommended washing product Woolite for All Colors is apparently no longer available.  Use instead the Leather Therapy products referred to later in the article.  

----------------------------------------------------------------------------------

Cleaning Leather Motorcycle Apparel at Home
By: Bucky 
Disclaimer: Users of this procedure do so at their own risk. Neither the author nor this magazine is responsible for any loss suffered in connection with its use. 

Cleaning of leather riding apparel is needed from time to time to remove the inevitable bug splats, road soil, perspiration salts, and the results of an occasional tumble from the machine.  
Upon searching for sources of cleaning services, it was found that they can be expensive, and that some local cleaners may not have experience with multi-colored leathers.  Therefore, those with limited funds or who lack a nearby cleaning source search for alternatives.  A few on-line sources suggest that washing at home can be done, so being frugal, this rider/writer had to try it. 

So far, three suits have been cleaned using this method, all with good results.  The suit documented here is a white Fieldsheer one-piece that is about 15 years old.  The other suits were a very bug-splatted and sweat-salt-encrusted Polo black/yellow two-piece and a Fieldsheer light gray/dark gray/black two-piece that had gone through a tumble.  
The white suit that is the subject of this article has been down once onto a mostly grassy berm, mud soiling and scarring a few places on it, as shown in the photographs.  The suit also had some minor soiling in the crook of the arms, and dark areas where the inside of the black riding boots touch the lower legs.  


The washing method used is detailed here: 
Test for Colorfastness
Use a dampened white towel edge to gently rub each color in the garment.  If there is little or no transfer of color to the towel and if there is no noticeable loss of color on the garment, this indicates that the quality of the leather components is high enough to allow wetting while cleaning.  

Products Needed
Woolite For All Colors Fabric Wash. 

Lexol Leather Conditioner, Preservative. 


Padded hanger for drying.  Slitting a foam plastic swimming noodle and slipping it over a sturdy wooden coat hanger is an inexpensive way to make such a hanger.  A noodle with a hole down the center works best.  Make sure the ends of the noodle cover the wooden coat hanger and that the noodle extends slightly into the sleeves of the garment.    


Washing Equipment and Settings
Domestic washing machine with as large a capacity as possible.  Either top or front-loading type is acceptable.  A top-loading extra-large capacity washer was used for this suit.
Set the water level to maximum.
Set the temperature for cold wash and cold rinse.
Set the agitation and spin speeds to delicate or slow.

Pre-Washing Procedure
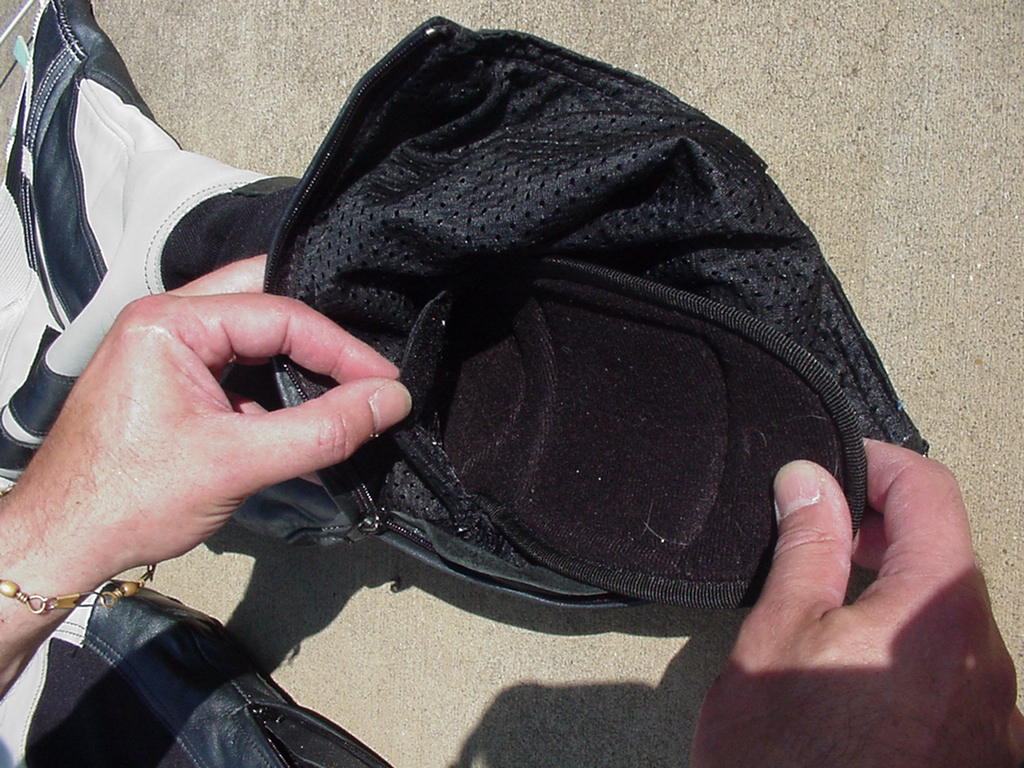
Remove all armor and padding that is removable.  These are usually fitted into pockets in the garment’s lining whose openings are closed with Velcro.  Sometimes the armor is accessible in pockets from the exterior of the suit. 
Remove knee pucks. 
If the garment is very dirty with mud or bug splats, hang it where it can be rinsed with a garden hose.
Spray the garment with the hose until it is saturated.
Use a clean sponge and a soft bristle brush to remove dirt from the surface, from the stitching, and from the seams.
Rinse thoroughly.
Immediately begin the Washing Procedure below without allowing the garment to dry.


Washing Procedure
Turn the garment inside out to protect the leather from the washing machine agitator and from zipper abrasions.  Close all zippers and Velcro.
Partially fill the washing machine tub.  

Add 4 oz of Woolite For All Colors Fabric Wash.  (Fill the Woolite bottle cap to the top.)  Agitate for one minute.  
Submerge the garment completely and distribute it evenly in the tub to reduce imbalance during the spin portion of cycle.
Wash only one item at a time.  

Continue to full the tub to capacity.  Set the agitation time for 12 minutes.  When that time has elapsed, but before the wash water has drained, reset the washing machine timer for an additional 12 minutes.
When the second 12-minute agitation portion of the cycle is complete, allow the machine to complete its cycle.
Again set the washing machine to rinse, redistribute the garment in the tub, and allow it to fill and rinse a second time to thoroughly remove the detergent.  

Meanwhile, clean the armor with mild detergent and a sponge, and the knee pucks with a brush.  Rinse and set aside to air dry. 

Treatment After Washing
Remove the garment from tub.
Turn it right side out.  Do not wring it or stretch it excessively.  

Hang it on a wide, padded hanger to avoid stretching the garment during drying.  
Close all zippers and Velcro to help prevent the garment from stretching unevenly.  
Two-piece suits can be zipped together and hung as one or can be hung separately.  (When the pants of a two-piece suit are hung separately, the spring clips of the pants hanger may leave depressed areas in the leather.)  If the garment is too heavy to hang, lay it flat on several bath towels.
While still wet from washing, apply Lexol Leather Conditioner, Preservative by spraying or wiping it on with a clean sponge.  The conditioner should be applied until is just begins to run.  

Use a clean cloth or sponge to smooth out runs, as these may cause streaking once the garment is dry.  Straighten out the garment so it has as few folds in it as possible.  Straighten the zipper flaps so they dry flat as well.  


Drying
Allow to air dry on the hanger in a heated or air conditioned room.  Do not dry near direct heat or in the sun.  A circulating fan is helpful in speeding drying, especially when the humidity is high.  

Occasionally, shake or “pat” the leather to manipulate the leather fibers and promote flexibility.  
If laying flat to dry, turn the garment over frequently and exchange the bath towels for dry ones to allow all portions to dry.  
The suit in this article took about four days to dry while hanging in an air-conditioned room with free air circulating around it. 


Afterward
Once dry, again treat with Lexol Leather Conditioner, Preservative.  Wipe off any excess.  

Allow garment to further dry for a day or two. 


Results
The suit is, in general, clean and bright.  There is no noticeable running of the colors.
The leather is soft and supple.  

The Lexol conditioner left a waxy finish that does not seem to cause excessive slipping on a synthetic leather motorcycle saddle.  
The leather shrunk very slightly, probably to its original size.  
The suit has been worn once since the washing, and it appears to have stretched a bit during that wearing, much as new leather would be expected to do.  
The mud is almost all gone, except in some stitching and in scratches where the leather was abraded in the tumble.  
The soil in the crook of the elbows was removed.  
The marks on the lower legs from the inside of the boots were not removed by the washing process.  
The sweat salt and stiffness in the other suit washed previously was removed without a trace.  

These pictures taken after the washing process show the worst-soiled areas of the white suit.

Some of the procedures described above were recommended by the makers of Leather Therapy preparations for cleaning leather.   
Their products have not been tried by the author, though they are specially formulated for leather cleaning at home. They recommend their Leather Infusion Wash in place of the Woolite For All Colors, and their Leather Infusion Rinse afterward.  After that, use their Restorer/Conditioner if the garment seems dry.  They have posted some videos that show the procedure. 

This shady-looking biker dude is showing off the finished product.  
----------------------------------------------------------------------------------
Well, there you have it.  Now there is no excuse for wearing dirty leathers -- unless you want people to think you ride a lot.  


Oh, no.  What have I done? 


 .

Saturday, August 29, 2009

Ride to Mt. Mitchell -- Highest Point East of the Mississippi


.
Our church riding group planned a trip to the highest point east of the Mississippi, Mt. Mitchell, in North Carolina. Though I had never been there, the roads on the way there were somewhat familiar, including the previously-reported-on US-178 and a section of the Blue Ridge Parkway. This is to be our longest ride thus far, so we start out an hour earlier than usual, at 8:30.

We are gratified that four new guys show up to join us for the ride. They are all from Easley, and have been interested in riding with us but never had the chance to get away on the days we scheduled previously. Even so, today they have not allocated enough time to do the entire ride, so they decide that they would break off part way through and return home.

The weather report has predicted rain chances for several days, but the latest report gives only a 30% chance, so we prepare to get started.

An aside:
I continue to be surprised at how little protective gear most riders wear. Nearly all of the riders I see in town have very little protective equipment in evidence. In the mountains, a higher percentage wear it, but even there it is, many times, not complete. A few are well protected. So I am in the minority as far as dressing for the ride is concerned.

As you recall, I never throw a leg over the bike unless I am fully geared up. For me, this is a leather suit, hard armor, motorcycle boots, gloves, and full face helmet. For most others, the protective gear consists only of a helmet and gloves. Sometimes the helmet is not included if they are not riding outside of South Carolina. Tee shirts, jeans, and light jackets in the summer time are the rule. We strongly urge our riders to dress for the fall rather than for the ride, but few actually do.

I recently purchased some new CE-rated hard armor for my white Fieldsheer one-piece leather suit. The modern armor is sold by Fieldsheer, and fit this old suit very well: The suit is about 17 years old. I bought it from a guy about thirty years my junior
(Whew, I'm getting old!) who raced an '86 Honda VFR 750. Amazingly, the suit is very good condition for its age. I always wear my VelocityGear back protector under the suit as well.

I have become even more of a gear preacher since last weekend when a fellow rider went down while we were riding together. He ended up with his bike wedged under a guardrail, and sustained a broken wrist and other injuries. If he had not been wearing a leather jacket, leather pants, motorcycle boots, gloves, and a full-face helmet, his injuries could have been much worse. He will be hurting for some weeks, but he is alive to tell about it.
Anyway, back to the day's ride.

There is a bit of mist at the start, but it soon gives way to partly cloudy skies and comfortable temperatures.

We have our usual pre-ride briefing. I think this is important, so everyone knows where we are going, the pace we will be riding, where we will stop and gas up, what the road conditions are likely to be, etc. One of the most important instructions is to ride your own ride -- don't try to keep up if your fear level is rising or you are making mistakes. Easy advice to give, but sometimes hard to follow, since there is a marked tendency to be more confident than your level of experience should dictate.

Oh, and we say a prayer before leaving for protection, enjoyment, fellowship, and a chance to talk with someone about our faith.

Today, we are following this route:


View Larger Map

We make our way to Pickens and US-178. This road is moderately curvy south of SC-11. As usual, we stop at the Holly Springs Country Store for a quick break. As I have previously posted, this is a meeting spot for motorcyclists of all types. Today is no exception, and I see two of the students from the Collision Avoidance Class held at the church a couple of weeks ago. They cannot ride with us today, lacking the time to go as far as we plan. They happen to be heading the same way we are to start, and they leap frog us on their way, having left after we did from the store.

US-178 becomes quite technical in places north of SC-11 until you reach Rosman, NC. All of the riders today make it through in about the same time.

Interestingly, our ages range from mid-forties to late sixties for this ride. I am about the least experienced in riding, and the only one on a sporty bike. I am the leader today, since I worked out the route.

I note that I am less tense on this road the more times I ride it. Perhaps I am becoming more adept at negotiating the curves and trusting the bike. I have certainly not memorized it like many of the more experienced riders here. I have to read each curve as it comes, though I have begun to recognize two or three especially tight turns ahead of time. Lest you think that I am burning up the road, I'll tell you that I am slower than many who tackle this route.

We stop in Rosman to hydrate, since there is only one more place to do so until we reach Asheville, NC. The four guys who joined us at the start must turn off here, as they have not planned to be out for the entire day. They will go east on US-64 and return to Easley via. US-276, SC-8, and SC-135. Bon voyage, gentlemen!

Next for us is a very short stretch of US-64, then on to NC-215. The latter is not as twisty, and is not in as good a condition as 178, but holds no major hazards, just some bumps and patches in the pavement.

The entrance to the Blue Ridge Parkway is quite unobtrusive, in keeping with the non-commercial nature of the road. Only a couple of small signs mark the turn. The rock overpass that you pass through before this entrance is another clue. Back in the thirties, the Parkway was a make-work project, and many construction techniques requiring hours of manual labor were specified to make the project provide more jobs. As a result, things like this overpass are quite attractive and of a type of craftsmanship not often seen today because of its cost.


We enter the Parkway at milepost 430 and go to the north. I have gone this way several times before, so am familiar with it. There are many overlooks along the way (about twenty-two between here and Mt. Mitchell), with vistas popping up on both sides of the road. This is possible because the highway traverses the highest points in many areas, so either way you look is downhill.


There are twenty-five tunnels all together on the Parkway, with several in this stretch at the mileposts listed.
  • 422.1 Devils Courthouse Tunnel 650 ft long.
  • 410.1 Frying Pan Tunnel 275 ft long.
  • 407.4 Buck Springs Tunnel 380 ft long.
  • 406.9 Little Pisgah Tunnel 500 ft long.
  • 403.9 Fort Mountain Tunnel 350 ft long.
  • 401.5 Ferrin Knob Tunnel No. 3 230 ft long.
  • 401.3 Ferrin Knob Tunnel No. 2 310 ft long.
  • 400.9 Ferrin Knob Tunnel No. 1, Trace Ridge 60 ft. long.
  • 365.5 Craggy Flats Tunnel 335 ft long.
  • 364.4 Craggy Pinnacle Tunnel 176 ft long.
It is wise to slow down through these tunnels, as many of them are long and some are curved so the sight distance is limited. It is easy to miss seeing a stopped or slow vehicle. In the cooler part of the year, ice can form in the tunnels, so extra care is needed then. Bicycles use this road extensively as well, and they are not easy to see.

We go along at the speed limit of 45 MPH, occasionally stopping to look or take a picture. We pass the US-276 entrance, milepost 411.8, where we exited the last time the group rode here. We next pass the Mt. Pisgah Inn where we had lunch that time through.

We gas up at a station near the NC-191 entrance. The North Carolina Arboretum is located here as well -- another good place for us to visit in future.

Once we get back on the Parkway, we continue north and start through the Biltmore Forest. This is land that was owned by Mr. George Washington Vanderbilt, who erected the largest private residence in the United States not far from the road. Vanderbilt was keenly interested in forestry, and had a good portion of the trees and other vegetation planted on his land, much of which had been logged out. The mansion is privately owned and is open for tours. It takes no government funds, so the price is higher than some other attractions, but it is well worth visiting.

There is also an interesting place to visit back on US-276 south of the Parkway called the Cradle of Forestry. It has both indoor and outdoor displays about forestry development. Early foresters got their start in this area of North Carolina. I went there last October for the annual Forest Festival Day and Intercollegiate Woodsmen's Meet. Teams of college students compete in log rolling, cross cutting, pole climbing, and such. It was interesting to watch.

From the Cradle of Forestry website:
"The 6,500-acre Cradle of Forestry Historic Site...contains the first official school for forestry in America – the Biltmore Forest School. After purchasing land in the Asheville, NC area in the mid to late 1800's, George Vanderbilt was prompted by Frederick Law Olmsted to hire a forester to maintain his property. Vanderbilt selected Gifford Pinchot to restore and manage his massive expanse of lands. It was during this time that Forestry in America began....

"These events paved the way for Dr. Carl Schenck to open the Biltmore Forest School in 1898. For 15 years, the students practiced the science and business of forestry and eventually produced over 300 foresters who began the profession of forestry in the United States."
This Biltmore Forest section of the Parkway has only a few overlooks and the curves are generally more sweeping than the section we have just left. It is noticeably cooler through here, too. The road is almost canopied in many places by the tall trees. The road is smooth and I enjoy the ride. There is a busy section south of Asheville, NC, where I suppose local traffic uses the Parkway for commuting. After that, it is again lightly traveled.

The Blue Ridge Parkway Destination Center is next up, at milepost 384. This visitor center, opened in April of 2008, covers the entire length of the Parkway. Displays inside show the history and features of the Parkway and surrounding territory.


Two of our bikes enjoying a rest while we look around.


The design of the Parkway was carefully engineered, down to the types of plantings to be installed.


You can get this key fob at the Destination Center. It is a reminder that the road is beautiful, but can be dangerous because of drivers taking in the views instead of watching the traffic, and because of the curving nature of the road.


I bought the zipper pull shown below. It depicts an actual sign on the Parkway, though not in the section we are riding today. I am not sure that a descending radius curve is the correct term, but decreasing radius certainly is, and there are some of those.

Here is a picture of a guy I know posing next to the real thing.

[photo courtesy of Ryan]

Precious children playing with bubbles outside the Destination Center.


After this, we head out again toward Mt. Mitchell.

Near Craggy Gardens, around milepost 364, the road is under construction. There had been a rockslide here in March of 2008, and they have been repairing it ever since. The road has only just reopened in the last few months. The pavement here is pocked where the top layer has come away. There is even one section where it is one lane with a traffic signal to regulate traffic coming from opposite directions. This is the only traffic light on the Parkway, and fortunately, it is only temporary until they get the pavement down again.

We arrive at the road to Mt. Mitchell, NC-128. This is an interesting road because it does not touch any other state highway. Rather it is a spur off the Blue Ridge Parkway. There is a twisty road advisory sign, but I am surprised how easy the turns are on the way to the highest point in this half of the country. Except for one moderate hairpin, the road is quite manageable.


[photo from http://www.state-ends.com/]

We pass the restaurant -- we will come back there in a little while for lunch -- and arrive at the large parking area near the peak. We find a place amongst the many open slots. There are lots of motorcycles and cars as well as bicycles here waiting for us. Some of the bicyclists are no spring chickens, either. There are a few who look to be in their fifties. Rugged, fit individuals, these.

It is noticeably cooler here at the top of Mt. Mitchell -- about 60 degrees, just a bit cooler than comfortable on the bike. Once we start our walk to the observation tower -- all uphill of course -- my leathers provide about the right amount of insulation for comfort with the exertion. The elevation at the top is 6684 feet above sea level. Easley is at 1079 feet, so we have climbed over a mile so far today, not counting the hundreds of other ups and downs between here and home.

From Wikipedia:
"The mountain was named after Elisha Mitchell, a professor at the University of North Carolina, who determined its height in 1835 and fell to his death at nearby Mitchell Falls in 1857, having returned to verify his earlier measurements. [O]n the summit is the tomb of Dr. Mitchell."
The view is fairly good, considering the cloudy conditions. Though we cannot see that far today, some of the most distant points that can be seen are eighty-some miles away.


The sky almost looks like a painting, doesn't it?


Did you notice how variable the lighting is today in the pictures above? One minute it is bright and sunny, and the next it is overcast and gloomy.

After we have gawked at the surrounding country, we head back toward the small visitor center and souvenir shop. There are displays inside describing the mountain, the weather, and the flora and fauna. An interesting fact is that the climate here is about the same as that in Canada, due to the elevation. Hikers who are ignorant of this have spent nights unprepared for the low temperatures and high winds.

When we have looked at the displays, we mount our steeds and motor back down to the restaurant. It is in a nice building, and the menu has a good selection. I order a $7.00 smoked turkey sandwich, envisioning a pile of succulent meat with some tasty garnishes. Alas, the sandwich has only two thin layers of turkey, one leaf of lettuce, and a greenish-red Styrofoam-textured tomato slice. Well, the scenery out the window is pretty anyway.


[photo from Romantic Asheville website]

We spend a little while in the restaurant, but decide to start on our way back so it would not be too late when we get home. The return is the same as the roads in here until we reach NC-191 again, south of Asheville. The Parkway is a bit clogged at the construction area. We have to wait, so I snap a picture of the lone traffic light.


At 191, we reluctantly exit the Parkway and head toward I-26. We stop for a few minutes to gas up again, and I survey the sky and comment that we have avoided rain all day long and that there is no chance of getting wet now. How fortunate we have been!

The superslab is busy and we watch traffic for an opening to merge into. I do not have a lot of experience riding on expressways, but it goes OK. The pavement is grooved through here to reduce hydroplaning, and the grooves cause the bike to weave and wander a bit. If you don't panic and stiffen up on the bars, the bike finds its way without incident.

After some miles, we veer off onto US-25 and continue toward Greenville. About two minutes later, the Heavens open up without warning. Cats and dogs are swimming for their lives in mid-air. There is no place to stop and put on our rain gear, so we press onward. We fall in behind another rider and his passenger, and hunker down. The rain is cold, and after a short time I feel it pooling in my nether regions: Not a good feeling.

Just as quickly as we entered the downpour, it stops and the sun comes out about when we get to SC-11. We turn onto it and go toward SC-8, Pumpkintown, SC-135, and then Easley. By the time we are half way home, the sun and wind have mostly dried my leathers -- including the sensitive spot -- and I am warmed up again.

We break off and scatter to our homes. When I turn off the bike, I note that I have ridden 253.3 miles -- shy by only five miles of being the longest single day ride of my career. My longest ride was with a group of sportbikers into Georgia last February.

I pull the bike into the garage, and begin to put things away. My leathers are still damp, so I ask our son to apply a dressing of Lexol before I take off the suit. A coat of the same on my boots helps them as well.

I peel off my suit with new-found ease because I have that new armor I told you about earlier in the suit's pockets instead of the full VelocityGear armored shirt on under the suit. I don't need help getting out any more! Here is a picture of that suit.


[photo taken at Wigington Byway overlook, July 27, 2009]

I hang the suit on a padded hanger in the house so the air conditioning can dry it slowly. I made the padded hanger from a wooden coat hanger covered with a section of foam pool noodle. It is much cheaper than a ready-made soft hanger.


It has been a long day -- it is about 6:15 PM -- but I have enjoyed the trip very much. I find that I am not too tired because we stopped several times and went along at a relaxed pace most of the way.


If you go:

Some excellent, tank-bag-size, printable Blue Ridge Parkway maps are available on the Blue Ridge Parkway Association website.

The Blue Ridge Parkway by Virtual Blue Ridge website has panoramic photos of many of the overlooks. Click "Parkway Tour," then "Overlooks."

The WikiTravel website has a mile-by-mile listing of overlooks and entrances to the Parkway.

A very good book with many illustrations is Building the Blue Ridge Parkway By Karen J. Hall, Friends of the Blue Ridge Parkway, Inc.

A website with some pictures taken along the Parkway is here.


Bon voyage!
.

Monday, January 26, 2009

First rides ...and a mishap


Once I had the motorcycle home, I began looking it over. The fine, shiny plastic cowlings gleamed in the light, and it seemed prudent to buy a set of frame sliders in case I tipped it over. I did not want to cut the cowlings as some sliders require, so I settled on a set of Kawasaki OEM sliders. I bought them from Blue Ridge Performance [BRP], their having the best price. Gary, the owner is a bit of a character, but he has good prices on 650R parts and accessories. Once the sliders arrived, I installed them over the next couple of evenings.

I also thought it prudent to get some body armor to wear when riding. The SquidBusters Forum had advertisements for the VelocityGear Juggernaut armored shirt. It consists of a back protector, chest protector, shoulder, elbow, and forearm CE-approved armor. The back protector can be zipped off to be used separately. It was priced attractively, and there was a discount if you were a forum member. I placed the order.

...and I bought a new silver helmet, a Scorpion EXO-700.

Oh. I should tell you that for some reason, while I was waiting for the MSF Basic class weekend to roll around, I decided to grow a beard and mustache. Actually a goatee and mustache. I had not had facial hair for around thirty years, so this was out of the ordinary. Maybe I was announcing the new me -- macho, motorcycle rider, hairy faced, young (second childhood?). Who knows. Actually, that is about the time I started using the nickname Bucky, too.

The first time out riding on my own, I was very shaky. I wobbled around turns, had to remind myself to look where I wanted to go, and generally had a time of it thinking about all the things that must happen to control and maneuver a motorcycle. There was not yet any sign of muscle memory helping me coordinate everything that had to happen. At any rate, the first few rides were taxing, and unnerving, with only a little of the enjoyment and exhilaration I longed to feel. I found that running along a straight road at 45 miles an hour was scary to me.

Slowly I gained some confidence, and began to have moments of enjoyment when riding. I ventured out on the roads near our house over several days, occasionally going further away.

I learned about target fixation next. It was a hard and expensive lesson. I was on a slightly curvy road, thought I could not make a turn, looked hard at the edge of the road, and went off within an inch of where I was looking. The ditch was shallow, but my nearly-new bike was in several pieces. Some of the shiny cowlings were scarred up, and the windshield, the seat, and a few other miscellaneous things were all separate from the carcass.

I called my wife from my cell phone with the news. She became...er...somewhat excited. So there I was, having flown off a nearly new motorcycle that is laying in pieces along a considerable stretch of road, asking my wife to be calm. I talked her down. A little while later, she drove to the site and stayed there with the bike while I went to borrow the neighbor's trailer to bring the whole mess home. She diligently piled all the loose pieces up so it would be less work once I arrived with the trailer. Two of our neighbors, Wes and Randy, were very helpful and sympathetic. Thank you, kind sirs. Once home and with the carcass unloaded into the garage, Randy gently asked me if I thought I would fix it and ride again, or whether that was the end. He philosophically and quietly stated that he had seen it done both ways. ...and he left it at that. At that point, I closed the garage door and went to bed.
-->
I have dwelled on the injuries to the bike, but not the injuries to me. I must tell you that I was almost unscathed. Here is why. I vowed from the start to wear all of my protective gear whenever riding, no matter how short a distance. You remember the photo of me on the Honda Nighthawk at the MSF Basic class wearing a leather suit, boots, gloves, and helmet? That was the start of wearing all the gear, all the time [ATGATT].

When I took my tumble, I was wearing all this gear:
  1. Fieldsheer two-piece leather suit
  2. VeocityGear Juggernaut armored shirt
  3. Joe Rocket Sonic boots
  4. ICON TiMax long gloves
  5. Scorpion EXO-700 helmet
I suffered aches and pains for a few weeks afterward. Over-the-counter painkillers made it tolerable. Without the gear, I could have been much more seriously injured. My strong advice: NEVER, EVER ride in anything but full gear. Anyway, I think it looks cool. I can ride up with a bunch of others, and not until I remove my helmet do the bystanders realize that I am middle-aged. That makes me feel pretty good.

I already hear your excuses:
  1. It is too hot.
  2. I don't like to be all bundled up.
  3. I like to feel the wind in my hair.
  4. It is too expensive.
  5. Nobody else wears it.
Answers:
  1. Wait until you feel the burning when they take skin grafts from your back/chest/head/thigh.
  2. Wait until they start to pick the gravel out of your hide.
  3. You might not have a skull, let alone hair, if you fall on your head...or you might be a vegetable.
  4. How much does one emergency room visit cost? And the lost wages away from the job?
  5. Everybody who is serious and practical wears the gear.
Look at these, if you can bear to do so, to see the effects of a tumble from a motorcycle:
So, I learned that target fixation works perfectly. The experts are correct: Your bike will go where you look!

It took me quite a while to get over the psychological trauma of my tumble. I had lost quite a bit of confidence in myself. I could not bear to tell my coworkers what had happened. Once I got over the initial despair, I started to determine how to make the bike rideable again. It turned out that it was good therapy to find parts and figure out how to put them together into a real motorcycle. A local shop, Baker's Cycle Werx, helped with some work I could not manage on my own.

Well, enough about my accident. Suffice it to say that two months and many dollars later the bike was back in one piece and almost as good as new.

I started riding to work as much as I could. There was almost nobody there who could believe that I had actually bought a motorcycle, let alone a sporty one. Even now, when I ride in, some of my work associates comment to me about my "Power Ranger" appearance as I come into the plant.

I met a grandmother at the post office last Saturday in fact, who said her four-year-old grandson riding with her in the car had spotted me riding up, and told her that I looked like a Transformer. I went over to talk with him for a few minutes about how he might be able to get a motorcycle one day but, as I knocked on my helmet, that he had to be careful with it so he didn't get hurt. Maybe the seed is planted.

I started riding further and further away from home, and I have visited some of the many sites within about 100 miles. I'll report on them in upcoming postings.

Meanwhile, here is what I usually look like when I ride, though usually without the saddle and tail bags.

Note that I am wearing ATGATT and that you can see the frame sliders.

...all color coordinated, to boot!

Pretty snazzy, don't you think?