Sunday, February 2, 2014

Chain, Again!

.

About 15,000 miles ago, in the middle of 2011, I replaced the original drive chain on my 2006 Kawasaki Ninja 650R.  It had become worn unevenly -- some links stretching more than others -- resulting in a jerky ride, almost as though the engine were misfiring.

I replaced the chain with an EK 520SRX Quadra X-Ring, part number 701-520SRX-114 and a rivet-type master link, part number 520SRX-MLJ.  That fixed the jerkiness problem back then. 

In August of last year, I noticed that the jerkiness was coming back.  It couldn't be the "new" chain, of course, so I dredged around for something else that could be causing the feeling.  I settled on the sprockets as being the most likely cause.  I ordered and installed a set of OEM sprockets from Ron Ayers. 

That seemed to help, but the problem continued to worsen.  I listened to extensive audio from my ride-along video camera, and the purr of the engine under all conditions was flawless as far as I could tell.  The symptoms, at least from the seat of my pants, still felt like the engine was misfiring, especially in the lower gears under hard acceleration.  Try as I might, I could not find evidence of that. 

I rechecked the chain tension at several points, and found the slack varying as much as the original chain showed just before I replaced it.

Rats.  Is that chain toast already?  Did the somewhat worn sprockets cause the new chain to fail prematurely?  My demure riding style certainly didn't contribute to its early demise, I don't think. 

I don't know for sure what caused it.

At any rate, I went back online and looked for a replacement chain.  I didn't want to try another EK, in case that was a contributing factor, so I looked further.

I found quite a few types and brands of chain, but many of them were non-O-ring, so they were not right.  You have to have a chain with O-ring seals so it lasts a long time even with it getting wet. 

Almost all chains say they come with a master link, but I had a terrible time figuring out whether the master link is a clip type or rivet type.  I never did find this answer for most of the chains I looked at, so I assumed they were clip type.  You shouldn't use such a link on a highly-stressed drive chain, as it is weaker than the regular links and may fail or come open.  That would be very bad.

Once I had tentatively picked a chain I could afford, I started to look for a riveted master link to match.  Surprisingly, there were few references I could find that pointed me toward the right one.

They ought to tell you what you are getting with the chain and make a link [pun] to the matching riveted master link page. 

After a good deal of armchair searching, I finally settled on a higher-priced-than-EK DID chain from Amazon.   It is a pretty gold-linked one: DID 520VX2GB-114 Gold X-Ring chain, and rivet link part number DID 520VX2GB-RIVET-CL Gold.

The numbers and letters mean that it is a number 520 chain, has gold links, X-ring style seals, and a length of 114 links.

Prices for the chain and the link were $79.73 and $7.97, respectively -- about 40% higher than the EK.

Maybe this one will last longer.  The product description says "Projected wear life 35.0 times longer than a standard chain under similar conditions."  If that is true, it should last me more than a lifetime.  Note, however, that it says "35.0," not "about 35 times."  They must think they are very accurate in this, but that is hogwash.  What is it measured against?  No way is it possible to predict that well. 


I few days after I pressed the order button, the chain arrived in the mail, and I set to work. 

The first thing I notice is that the instructions for the chain are in a barely intelligible translation from Japanese.  There are also some of those little pictures with exclamation points and such to explain to those who do not read any of the 257 languages printed on the box.  Why do they not pay somebody to translate for them?  I could do better, I believe.  I wonder how much they pay.  

I suppose most people just wing it, instead of trying to read the instructions. 

I put the bike on the rear stand and use my pneumatic grinder (#52847) and a cutoff wheel from Harbor Freight Tools to grind off the old chain master link rivet heads.

I break the old chain with the Stockton Chain Breaker (#28165) I bought from Cycle Gear.  I oil the threads and the tip of the chain tool to make it easier to use, since it takes a lot of force to work with a chain of this size.

Once the chain is unzipped from the sprockets, I clean the accumulated crud and lube, especially from around the front sprocket, and thread the new chain into place.  I have to move the rear wheel forward considerably to make the new chain reach, so the old chain must indeed have been stretched.

I pop the new rivet link into place and make sure to press the side plate on to the correct width dimension.  I measure across from side plate to side plate on one of the standard links and push the master link together with the chain tool to equal that dimension.  I work slowly, a little bit at a time, and use a digital caliper to make the measurements.

The plate press attachment:

Measuring:

Then I flare the link pins over so the side plate won't come off.  This takes a lot of torque on the chain tool, but I work at it little by little too, measuring the flared diameter to make sure it is sufficient, but not too much.  Too much may cause the pin to fracture.  Not good. 

I tension the chain by tightening the nuts on the two studs behind the rear axle, making sure the alignment markings display the same, side to side.  This time, however, I also have a new tool to check for proper alignment of the rear sprocket.  It is an OTC 4749, also sold as MotionPro 57-8048.  It cost $12.90 from Amazon.

... but mine matches the color of the bike! 

There are too few instructions on the product package, so I looked around and found on-line instructions and a video that describe its use.

The little piece of wire hanging down next to the numbers acts as a plumb bob so you can tell if the rod is parallel with the ground. The MotionPro doesn't have that. 

That helps make sure you are not fooled when sighting down the chain by the tool being aimed too high or too low.  You sight down the rod, and if the chain does not deviate from that line, it is OK.

Mine is surprisingly well aligned using only the markings on the rear axle carriers.  I make some minor adjustments, then tighten the rear axle nut and recheck the chain tension, because sometimes tightening the axle causes the chain tension to change a bit.  It turns out OK. I put in the cotter pin and bend over its legs so the rear axle nut cannot loosen. 

[Well, Bucky, you have spent a lot of time and money here.  Did this finally solve the problem?] 

The first ride into the foothills confirms that the chain was the issue with the "misfire" problem. The bike really does almost feel like new now -- smoooooth again -- and ready for the next who-knows-how-many miles.  I am not going to guess how many, but 35.0 times the life of a "regular" chain (say, like the EK) is more than half a million miles.  That ought to be enough to get me through.  I will make a posting when I change it next time. 

As long as we're exaggerating, after this first ride, the estimated 17 pounds of grease the new chain was packed in is all over my pretty, recently-cleaned rear wheel.  So, scrub-a-dub-dub. Again. 

Here are a couple pictures taken during the chain test ride, right here under the bridge on Roy F. Jones Road.


Pretty, even in winter.  See you next time! 
.
.

Tuesday, January 28, 2014

Oh, No. Snow!


.
Well, it has been quite cold here in normally balmy South Carolina.  The temperatures have been below freezing for several days at a time.  Rather unusual for us. 

Fortunately, there has been little precipitation around home.  Otherwise, we would have been subjected to accumulations of that white, fluffy stuff. I forget what they call it....

Now, I was born a Yankee (definition: somebody who comes from a Northern state), but I have been in the south for many years now, and I don't miss that white stuff much at all.  Rusty cars, heavy shoveling, roads with ruts instead of lanes, frozen door locks, high heating bills, etc., etc. ...and no motorcycle riding for several months out of the year, though I didn't have one back then.  

Over this last weekend, the temperature went up into the low 50s, so I went out for a quick ride to Whitewater Falls, a place I have been many times in my riding career.  Some of those times are chronicled here:
But this time, I spotted something I had not previously seen there. 

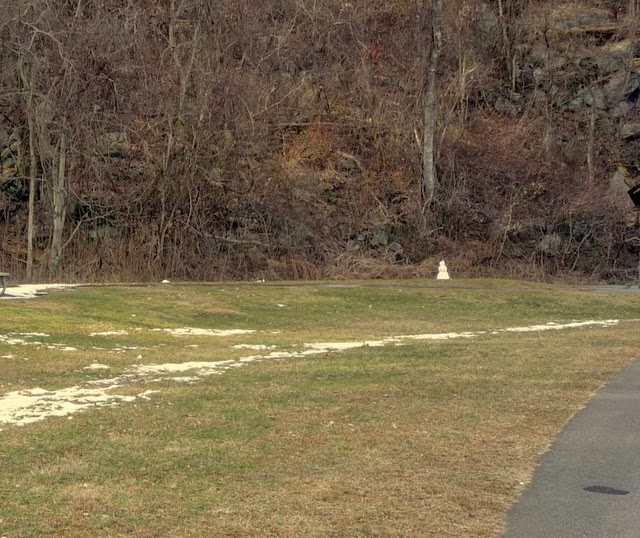
Someone had built a snowman, and there were remnants of snow on the ground way over there on the shady side of the hill. 
Now, the elevation difference from home to the falls is about 1500 feet, so the temperatures are colder up there.  Hence the ...oh, now I remember...snow. 

Fortunately, all of the roads to get there were clear of debris, salt, and gravel, so the ride was easier that it might otherwise have been.  The roads, US-178 from Pickens to SC-11 and SC-130 from SC-11 north to the North Carolina state line, are a great succession of mostly sweeping curves.  The wind was very gusty, however, and was particularly strong in open areas.  It pushed me sideways a few times, but it was manageable. I was bundled up enough that I didn't even feel a cold draft anywhere.  

That is an interesting feeling, almost an invincibility -- the wind howling and cold, but not affecting you.  Those nice warm heated grips and Hippo Hands help a lot, too. 

I didn't stay long at the park, and didn't hike the trail to the falls itself this time, as my daylight was failing.  I saddled up and made my way back down 130 and then cut through on SC-133 and Shady Grove Road to Pickens and home.   Again, all sweepers.

I didn't time it, but it didn't seem to take as long going up and coming down 130 as it usually does.  This time around, there were no cars or trucks that slowed me down in either direction.  That could be it.  Maybe I was enjoying it so much that the time passed quickly.  Or, maybe I am riding a little faster.  Not sure.  

Anyway, it was good to get out on a clear day in the middle of winter.

Snow, keep away! 

Oh, by the way, let me give you some perspective on the size of that snowman.  

Cute, eh?  I am sure, though, that little man is long gone by today.  


January 28, 2014, 7:30 PM

Update.  Well, I thought the little snowman would be melted by today, but the way it looks now, the snow followed me down to the lower elevations, and they got more at Whitewater Falls, too. 

We got about an inch here, but this paralyzes us here in the South, where I think we have one snow plow for all six or seven southeastern states.  The snow certainly prevents two-wheeled travel in all but the most unusual cases.  Maybe like this guy: 

Found on AdV Rider Forum
Fortunately, the snow does not usually last very long.  Here's hoping. 

See you on the roads again after the thaw! 
 

.
.

Wednesday, January 22, 2014

Jail Time

.

On the way home from a ride in the mountains the other day, I had to spend some time in jail. 

Now, I am sure you'd never have thought that good ‘ol Bucky would wind up behind bars. 

But I did, and here's the view from inside to prove it, looking out through the mesh at my faithful scooter: 


Here’s the story.  

My time in jail started in a portable cage on wheels that was once used to house prisoners overnight while they were working off their debt to humanity, but were working far enough from the jail building to preclude their returning each night to sleep there.  Back in the early 1900s, a responsible municipality could purchase a cell on wheels that would be located near the workplace of the convicts, and give them a warm, dry -- and secure -- place to spend the night.  

The one I was a captive in, made by Manly in Dalton, GA, slept 18 men, and had a place for a warming fire, and canvas sides to keep the wind out and the heat in.  The steel wheels originally had solid rubber tires that are long gone. After the county acquired gasoline powered trucks and machinery in the 1930s the cage was no longer used.

I had to check it out thoroughly.  There was a latch on the outside, so I opened the door, went in, and had a look around. 

It didn't feel much like home, frankly.  

Going into "my" cell:   

I was smart enough not to close the door behind me. Sure as shootin' some neighborhood kid would come by and lock the door with me inside. 

No, I didn't get trapped inside and then have to appeal for help from some benevolent soul passing by. 

It is the old Pickens, SC jail that this cage sits outside of.  It has been turned into a museum of sorts.  After I left my outside cell, I served some time spent some time in the main building, originally built in 1902.  

…not in a cell, mind you… 
 

Anyway, there is only one cell left in the building. This one:

That noose back there was used for the last two public executions in front of the courthouse in Pickens County in the early 20th century. 
 

The jail looked like this in 1908: 
South Carolina Department of Archives and History
The jailer and his family lived in quarters on the west side of the building.  Some of the barred windows today have shadowy silhouettes of bad guys behind them.  

The jail building houses displays of quite a lot of local history from the olden days.   

There are also some exhibits that describe people who have been important from the area, and there are four Congressional Medal of Honor recipients born around here.  Brave men, those, who served above and beyond the call of duty: 

There is almost always a display of artwork as well.  One of the displays right now is by a Greenville artist, Pat Kilburg.  

She does some of her art using a method called encaustic but uses more familiar materials as well. 
Look here:


I confess that I don't understand the round things as subject matter, but suppose some art connoisseurs must. 

A dozen other artists currently have displays here too.  One of their pieces:
This is a serendipitous one called "the Sky is Falling," by Beth Bullman Regula. 

I don't understand it either, but it is fun to look at. 

Well, luckily they sprung me after I had looked at all of the displays and artwork, I made my way to freedom, hopped onto the saddle, and headed down the road to the comfort of home.  

Oh.  Try not to go to jail for real, please. 
.
.

Saturday, January 11, 2014

Might as Well...

.

A few weeks ago, it had been cold and rainy here in usually-sunny South Carolina, so I had not been out riding nearly as much as I would have liked to. 

The bike has a little more than 40,000 miles on it now, and I have heard that the rear shock absorber loses its damping ability at about that age, maybe before.  Of course, I hadn’t noticed much of a difference because it has aged slowly.  This unit is not adjustable except for spring preload, so there isn’t anything you can do except replace it.  You can get adjustable ones on the aftermarket, but their price north of 6 bills deterred me from going that route. 

It occurred to me that I had a new rear shock/spring in my box of spare parts, purchased on e-bay some time ago.  It was probably taken off a wrecked bike, as it was very new looking, with no dirt or dust on it at all.  So, it was likely that it had very few miles on it; some unfortunate rider likely totaled his almost new bike, though it is possible that he simply replaced the rear shock with one of those aftermarket units to improve performance. 

I decided to change to the new original equipment shock and see what happens. 

I leafed through the shop manual to see how to replace the shock.  The 650R does not have a center stand to facilitate this kind of work, so they recommend removing the lower cowlings and the muffler, which is beneath the engine, so you can jack up the rear of the bike to take the weight off the rear suspension.  I judged that trying to get the muffler off after some 40,000 miles might be difficult, and I don't have a suitable jack anyway, so I looked for some other way to lift the rear end. 

A few years ago, I had rigged up a lift eye in my garage, secured to a stout gluelam beam that spans the width of the garage and holds up the second floor.  I have used this to support the bike when changing the front tire.  I also have a fabric lifting strap and a come-along to use with this skyhook, so I looked over the bike to see if that could be used. 

I reckoned that if I removed the cowlings around the seat, I could fish the strap under the frame and lift up the whole shebang. 

I first used wire ties to hold the front brake on so the bike would not roll while I was lifting it. 

By the way, that flat bar secured by the bar-end weight is the bracket that keeps the wind from collapsing my Hippo Hands and preventing me from getting my fingers around the levers.  

I then set to work on the rear end, and within fifteen minutes, the pretty plastic parts were removed and the back of the bike was hanging in the air, the tire just barely touching the concrete. 

With the suspension fully extended, the upper and lower screw mounts could be removed and the shock easily slipped out of its position.  The new one slid in with equal ease. 

I consulted the manual again for the correct torques, and made the shock secure. 

That looks nice.  It should work like new. 

Oh.  Wait a minute.  That rear wheel looked pretty dirty with road grime and a little chain lube overspray.  I might as well take care of that while I am right here.  I got out my cleaner and wiped down the wheel and spokes. 

As I consulted my service records, I noticed that the air cleaner element needed to be cleaned and reoiled.  I might as well do that while I am into it.  To do this, that gas tank has to come off.  On this bike, there is a little – and I mean little -- room after you remove the screws at the rear of the tank to reach under it and disconnect the fuel line from the fuel pump in the tank and the fuel pump electrical connector. 

Luckily, I had run the tank down very low after the last ride, so it wasn’t very heavy.  Well, since I had the tank off, it would be a shame not to see if the fuel filter was dirty.  Might as well.  The filter is not replaceable, but some of the on-line forums suggested that you could rinse it in clean fuel and backflush some of the dirt out of it by repeatedly squeezing it.  I turned the tank on its side and removed the pump.  The sock filter was only a little dark, but I decided to agitate it in some clean fuel and squeeze it as they suggested.  The fuel turned dark, so I must have been at least partially successful in cleaning the filter pores. 

The air filter element requires that a few more fasteners be removed to slide it out.  When I did that, I noticed that the inside of the air box was dirty ahead of the filter, and some of the oil the filter had in it had puddled in the bottom.  I might as well take off the air box and rinse it out good. 

Do you see a trend here?  This might never end! 

I stuffed some rags into the throttle throats to keep out dirt and anything else I might drop into them.  There is a drain hose and a connection to the crankcase breather on the bottom of the air box that are nearly impossible to reach, so that took a little extra time to figure out.  I vigorously flushed out the air box with detergent and water until it looked new again.  The air filter was rinsed in solvent, dried and reoiled.  I slid it into place, and reassembled everything. 

Since the air filter is so out of the way and difficult to get to, I wonder how many bikes never have it cleaned during their entire lives.  Probably a lot. 

The spark plugs are now almost visible beneath their individual ignition coils, so I might as well check to see their condition.  I assemble just the right combination of extensions for my ratchet and remove the plugs.  

 
Both of them look nice, with a light brown coloration to center electrode porcelain.  I put them back in, put a little silicone grease in the coil boots and slid them tightly into place.  The primary connectors snap on easily. 

Next up is squeezing the air box back into position between the frame members with their electrical wiring bundles strapped to them.  This was a challenge, and those two hoses on the bottom were even more difficult to put back on than they were taking them off. 

I think you sometimes need tentacles for hands to work on these things. 

The fuel line and pump connector were fairly easy to reconnect, so that wasn’t an issue this time. 

Once everything was put back together, I found that overall the bike was pretty dirty from my last few rides.  It needed to be washed and dried. 

I might as well do that too, as long as I am at it. 

I scrubbed and brushed and sponged until it was reasonably clean.  My daylight was fading as I rinsed it all off with plenty of water from the hose, then used the leaf blower to dry it off again. 

Now that it was clean, a little wax on the tank and those pretty plastic body parts would finish it off nicely.  I might as well, as long as I am at it. 

Then I spotted the chain.  It had gotten wet during the bike bath, and it was time to clean and lube it anyway, so I might as well do that while the bike is off the ground and the rear wheel can be rotated freely.  I retrieved my squirt bottle of kerosene and my chain brush and got to work again.


Before long, the chain was as clean as I could get it, and I sprayed it down with fresh lube. 

That looked good.  I reset the trip odometer that I use to tell me when to service the chain, and I scanned the area to see if I had any spare parts left over. 

Fortunately, there were none. 

After that, I glanced at the clock and noted that it was getting on toward bedtime.  I reluctantly decided that I had to stop looking for things I might as well do, and finish the job I had started. 

Hmmmm.  This could be a disease of some kind…  Maybe I should seek treatment for chronic might-as-well. 

Well, might as well.  Maybe tomorrow. 

For tonight, I put away my tools, moved the bike back to its proper place in the garage, and turned out the light. 

Are you similarly afflicted with this malady?  If so, let me know what the remedy might be. 
.
.

Wednesday, January 1, 2014

Last Day/ First Day

.
Well, the old year has passed, and a new year is upon us.  Did you get a chance to get out on the roads or trails yesterday or today? 

The weather cooperated, and I was able to get out for a short time both days.  It was cool: about 41 degrees to start on both days, and a little windy today, but were certainly rideable conditions.

Both days, I meandered around near the intersection of US-178 and SC-11.  That is where the Holly Springs Country Store is located, a favorite place for bikers of all variety to gather, plan rides, and chew the fat.

Alas, not one biker was there either day, and I passed by there four times. 

I continued west on US-178 to visit Sassafras Mountain, the highest point in South Carolina.  I have been there many times, but this time, the gate was open that leads to the actual highest point.

A closer view:

Naturally, I had to go up there.  They have placed a plaque that shows where the highest point is, and a bench to rest on.  Trails lead off in at least two directions for the hardy ones who hike the mountains.  A maintenance worker was busy on the cell tower that is located here. 

The road, however, was covered with wet leaves, and was quite slippery. 
I gingerly used my back brake to edge back down the slippery slope that is surprisingly steep under those conditions. 

The gravel parking lot is the place to park to walk out on the overlook platform whose design I have been critical of.

The platform is still ugly, and is rusting and rotting away despite the designer's claim that it is a long-lived structure.  They have already had to brace it so it doesn't wobble. 

For some reason, vandals have attacked the sign leading to the overlook.  This is about the third one that I know of.

Someone has beat it up pretty badly, but look at the back:
They used a chain saw to cut through all of the lumber holding the sign to the post.  Nevertheless, they still couldn't get it to come off.  Why would somebody want it that badly?

After a look from the platform, I mount up again and make my way back down toward Rocky Bottom on US-178.

Before I reach 178, I meander onto Glady Fork and East Fork Roads, then to just south of Rosman, NC.  I hit US-178 again and turn east and go down the slope, heading again for Rocky Bottom and to the Holly Springs Store beyond.  That means that I pass through the place where the photographer Patrick Welsh takes pictures of passing traffic. 

On these curves: 

I suppose I am faster through here today than I was back in 2009 when he snapped my picture, but I don't watch the speedo when I am negotiating curves, so I don't know for certain!

I get home after only around 100 miles, but it has been fun to be out on the last day of the year. 


Today, the first day of January, I was fortunate to slip out for a few more hours of seat time.  I went up to SC-11 again, but this time to Table Rock State Park, another place I have been many times before. 

I get glimpses of it from the roads on my way there.  Like this:

A little closer:

And as close as you can get, while still on the road.

You can hike to the top of Table Rock, but it is an elevation change of over 2400 feet in 3-1/2 miles, so your pacemaker had better be in good shape to make it. 

After I leave the park, I return to Pickens South Carolina, a small town that you go through to get to the mountains.  I run the Perfect Curve again, maybe a few miles per hour faster than the time I wrote about it. 

Neither today nor yesterday do I see many others out on two wheels.  Only two yesterday and one today, not counting the single lone bicyclists I saw, one each day. 

I do a little low speed practice on a cul-de-sac near home, then put the bike away for the new years day dinner my wife has prepared.  Today, I only went about 79 miles, but it is great to start off the year this way. 

Have a good and prosperous new year. 

Ride with you again soon.

.