
A while back, you may recall that I installed a new chain on my 2006 Kawasaki Ninja 650R. The symptoms back then almost felt like the engine was missing, especially in the lower gears under hard acceleration, but try as I might, I could not find evidence of that.
As it turned out, after some 25,000 miles, the original chain had stretched more in some places than in others, so the effective drive ratio was changing a few times with every circuit the chain made around the sprockets. The new chain solved the problem of the unevenness I was feeling.
I didn't change the sprockets at the time, because they did not appear to be worn enough to justify it. Most advice says to change the sprockets at the second chain replacement. Of course, the front sprocket was worn more than the rear because it is smaller and each tooth contacts the chain more often -- about three times more often than the rear sprocket since there are about three times the number of teeth -- 46 -- on the rear vs. the front -- 15.
With the new chain, the drive was smooth again, so I had not thought any more about it until a few weeks ago. The unevenness had come back.
Now what could be wrong? Has my "new" chain already worn out? It is only 14,000 miles old. Have the old sprockets damaged the new chain?
I check the chain for stretch at several positions along its length. That doesn't seem to be an issue.
What next?
The front sprocket shows some hooking of the teeth, the rear less so. Well, the likely culprit is the front sprocket, but I decide to change both in case the rear has worn just enough to be a contributor to the problem.
To the Internet, then, to do some shopping!
I search ebay and Amazon, and a few of the on-line bike parts sources, but find the best prices for OEM sprockets at Ron Ayers. You can buy aftermarket sprockets, certainly, but the front original has a rubber cushion built in for noise and harshness reduction. I want to maintain that feature that most aftermarket sprockets do not provide. As long as I am buying the front, I go ahead and buy the rear and the countershaft-locking washer too.
I press the magic computer buttons, and the order is placed.
A few days later, the parts arrive, and I commence with the surgery.
First comes removal of the sensor that counts countershaft revolutions so the fuel injection computer knows what is going on, and so the speedometer and odometer register properly -- albeit the speedo has always been about 5 MPH optimistic at 60, though the odometer is correct.
That was easy. On to the next step.
The front sprocket has that lock washer that prevents the nut on the countershaft from loosening. It does that by your bending its edge against one of the flats on the nut. I straighten out the washer, and get out the air impact tool I bought when the Tractor Supply store opened here and the 27mm impact socket I bought at O'Reilly Auto Parts. (Don't try to use a 12-point conventional socket; it will round over the corners of the nut.) I fire up the air compressor, ask my wife to help me put the bike on the rear stand, and to hold the rear brake while I apply the impact tool to the nut. I remember to put the transmission in neutral so the engine doesn't turn while this is going on, because it could cause damage.

The impact tool sounds like a giant angry woodpecker, clacking away, but this woodpecker has no discernable effect whatsoever on removing the nut; it remains firmly in place. I guess that is good -- it certainly wouldn't have come off accidentally.
I examine the visible threads inside the nut and use my engineering logic to conclude that this is, indeed, a right hand thread, and that I am not trying to tighten it instead of loosen it. It is.
I try the impact tool again. And again. My wife is getting tired of holding the rear brake, and she lets me know that.
Finally, I hear the familiar "brrruuup" of an impact tool unzipping a fastener, and the nut comes off of the shaft.
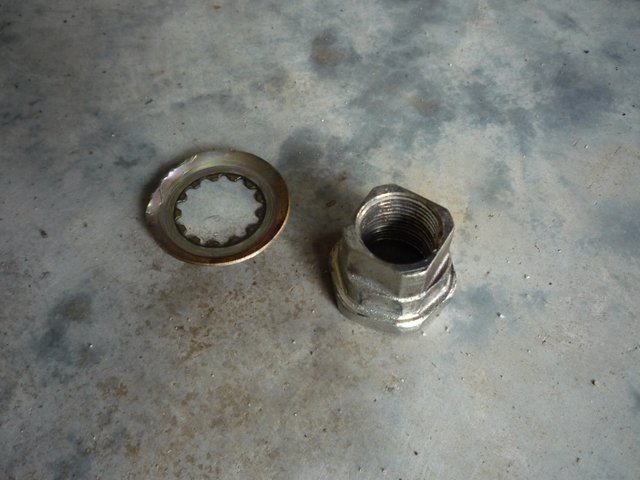
The locking washer and the stubborn nut, free at last:
Whew! I had had visions of having to take the bike to a shop just to get that nut loose...and the mechanic taunting me like I am a 98-pound weakling for not being able to get it off.
I thank my wife for her help with a smooch and a hug (I hope I am not too greasy), then get back to the task at hand. I loosen the rear wheel to put some slack in the chain, and the front sprocket comes off easily.
There is a large amount of accumulated chain lube around the sprocket, so I clean that out.
I remove the rear wheel, and use the impact tool and the appropriate impact socket to remove the six sprocket retaining nuts. A little cleaning up of chain lube from around that area, and I am ready to start reassembly.
I carefully examine the service manual for the correct torques, and get out my trusty torque wrench.
The rear sprocket goes on easily. I apply molybdenum disulfide/oil assembly lube to the new front sprocket splines and to the face of the nut, then loop the chain around and install the sprocket and washer. I snug the nut, but I have to wait for the rear wheel and chain to be installed before I can torque it because I need the rear brake applied to keep the shaft from rotating as before. (For that, I have to go get my wife again.)
I position the chain around the rear sprocket, and reinstall the rear wheel. I tension the chain by tightening the nuts on the two tension studs, making sure the alignment markings display the same, side to side.
I tighten the rear axle nut and recheck the chain tension, because sometimes tightening the axle causes the chain tension to change a bit. It hasn't this time.
I also remember to check the chain tension at its tightest point. You do this by rotating the rear wheel and feeling when the chain has the least amount of droop on the bottom, or return, side. If you don't do this, there is a chance that the chain will be too tight when the suspension is deflected while riding. This could cause expensive damage to the countershaft and its bearings.
I call for my wife to come out again. She drops what she is doing, and appears, wondering how long it is going to take this time. I assure her that this will only be a short tenure this time (I hope). She holds the brake pedal as I tighten the countershaft nut to the 95 ft-lb spec. I use the impact socket on the torque wrench for the same reason as when removing the nut -- to keep from rounding off the corners of the nut.

I again check chain tension and everything is good. I bend over the edge of the countershaft lock washer so it is against a flat on the nut. Don't want that coming off, now do we.
Everything looks OK, so I put the RPM sensor and the front sprocket cover back on. I install the cotter pin in the rear axle nut, and tighten the chain tension stud jamb nuts.
An application of lube to the chain is next.

Ready for a test ride.
I suit up, and take it for a little spin. I try some quick accelerations and pay attention to the feel, and whether the problem still exists. The unevenness is greatly reduced.
I think this may have fixed it. The only thing better would be to have replaced the chain again, but I am not made of money, so that will have to wait a while.
Lesson learned: At least replace the front sprocket when replacing the chain. Here is a picture of the old next to the new front sprocket.

Resource to help investigate final drive sprocket ratio changes: Gearing Commander
.
.

.
1 comment:
That's why I always replace chain and sprokets at the same time ;)
Post a Comment