Thursday, April 2, 2015

Pooped Pump....No Fuelin'...

.
OK, here's the rest of the story. 

On my way back from my first ride this year to the Blue Ridge Parkway a couple of weeks ago, within about three miles from home, the engine on the bike quit suddenly.

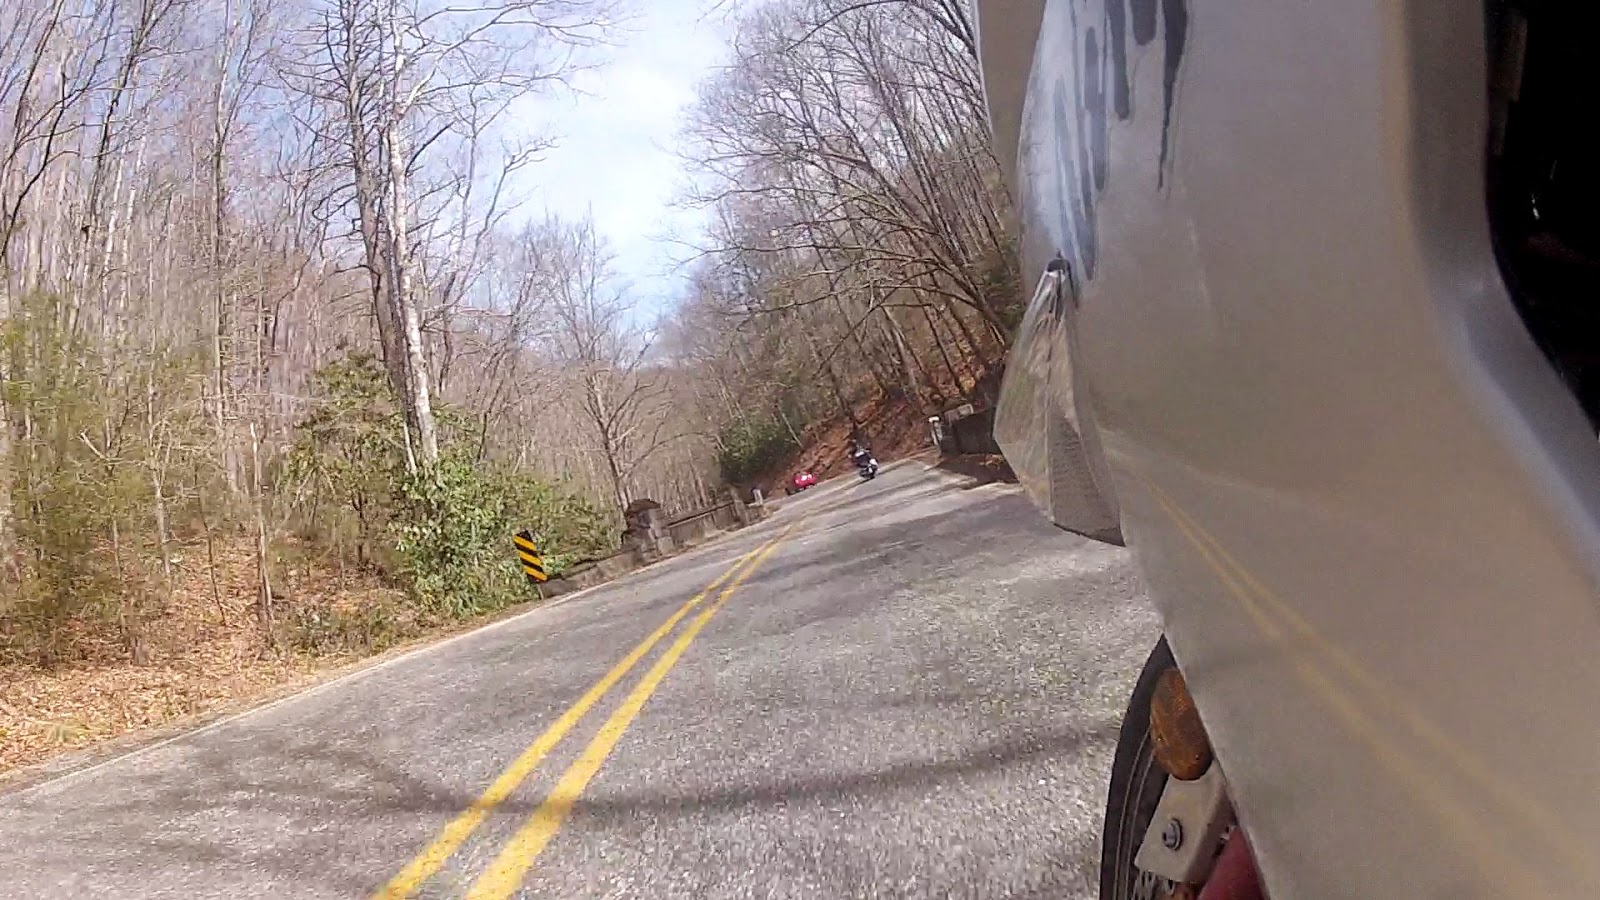
Almost exactly like this bike is doing:


Original video courtesy of YouTube user invisiblemon. 
He was still 16 miles from home at the end of the video, but did make it there a mile
or two at a time as the fuel pump was failing.  He later tested the pump and found
that its output pressure was low.

Not good. 

This can be quite disconcerting if you are in the middle of a turn or in traffic.  At any rate it can be disconcerting anyway, 'cause visions of having to call for help begin dancing through your brain when these things happen.  And, I hate to ask for help.  I think this is built into the wiring of a man's brain.

Anyway, I coasted to a stop, fortunately in a safe place, and pressed the starter button.  The engine fired right up again.  I revved it and it seemed OK.  About the time I was going to get back on the road, it quit again.  But it started right up.

Hmmm.

Plenty of gas in the tank.  Now what?

I let it sit for a few minutes, and it started and ran for a while, so I took to the road again.  It stalled again not a minute later.  Again it restarted, and I revved the engine while slipping the clutch very significantly.  When it ran, it ran strongly. 

It bucked and almost threw me a couple of times as the engine came to life at large throttle opening, died, then came to life again.  People around me thought I was a beginner or a stunter, I'm sure.  It was close to wheelying a few times.

Finally at the road to my house, it stopped and wouldn't restart.  I paddle walked it enough to get it moving downhill toward my house.  I coasted into the driveway as quietly as a mouse.

I decided to do some diagnosis.

I raised the tank enough to fish the fuel pump cable out to the side.  I probed the pump side of the connector with my voltmeter, and found steady power.  I started the engine.  It ran fine.

After about ten minutes, though, the engine missed slightly.  The voltmeter still showed steady, however. 

I put my ear to the fuel tank.  I could hear the fuel pump running, but it had a sort of intermittent screaming sound to it.  When the scream became more significant, the engine stuttered, then, after a little while longer, finally stalled. 

I decided that the pump must be failing, although I had never listened to the pump prior to this, so I wasn't sure what it is supposed to sound like.  I looked online to see if I could find anyone who had also had this problem.

Sure enough, the Ninja 650R forum mentioned a problem, and the fact that a new fuel pump part number replaces the original.  The original Fuel Pump Assembly P/N 49040-0010 has now been superseded by P/N 49040-0026.  The pump includes a filter, a pressure regulator, and the low fuel float switch.  None of these is serviceable individually. 

Four years go, another guy (known in the RiderForums as MCRider), then 70 years old, and who lives in the state of Washington, described how his 650R lost its fuel pump the day he started out -- with 71,000 miles on the clock -- on a month-long, 8,000+ mile ride to the East Coast and back on his identical 2006 Kawasaki Ninja 650R.  The symptoms sounded almost the same, though my bike has only 48,000 miles on it.  (As of his last posting in late 2014, his bike has over 110,000 miles on it.)  

I checked all of the on-line sources that I know of, including Blue Ridge Performance.   Gary, the proprietor, is a man of few words, but he usually can get what you need for 650Rs and his prices are as low as any I found, so I ordered up the pump and the seal O-ring that goes with it, P/N 92055-0185. 

It is best to siphon out all fuel before starting this work to minimize weight and reduce leakage.  All of this work should be done outside and away from fire and other ignition sources. 
I take no responsibility for this description, or its interpretation.  Always follow the proper service manual's instructions for your bike along with good mechanic's practices.  

When I received the package I started to work changing the pump.  Here are the parts, still snuggled in their packing materials. The new pump is manufactured by Keihin, as is the original. 


The teardown: 

I take off the seat (easy, peasey), and then the black plastic side covers on either side of the tank are removed.  Then the two seat bracket screws holding the rear of the tank.  

Be careful that the tank doesn't slide sideways off its mounting position if you are working with the bike on its side stand.  A rear stand is better here to help avoid that situation. 


Hold onto the tank so it doesn't slide, now! 

Raise the rear of the tank up on a piece of 2 by 4. 


Reach under the tank and disconnect the fuel pump electrical connector. 


And the fuel hose.  (There may be pressurized fuel in it, so wrap a rag around it before pulling it off the pump.

Next, pull off the rubber fuel filler overflow hose beneath the left side of the tank. 

It has a very small spring clamp holding it.  Don't lose it. 


Arrange two 2 by 4s on the ground to set the tank on, such that the fuel pump does not bear the weight of the tank. 


While you are there, you might as well clean the air filter.  Slide the large hose above it off its nipple and remove this screw to pull out the filter. 


Set the tank in a couple of sturdy corrugated cartons to hold it on its nose. 


If there is any fuel in the tank, some may leak out of the fill opening. 

Remove the five screws holding the pump into the tank. 


There is thread sealer on the screws, so they may be difficult to remove. 

The two pumps look the same on the outside. 


I do notice that there are MANY blue paint dots on the outside of the new pump. 

In the automotive industry, such paint dots indicate that some check is to be done, and the presence of the paint dot indicates that the check was [probably] performed.  I say probably, because most such checks are visual, but people get "snow blind" and miss defects but mark the part anyway.  I have experience with this very problem in a manufacturing operation, I'm afraid.  The factory that built this one must have lots of quality issues, judging from the plethora of blue dots.  

I remove the O-ring from the tank and inspect the seal area and screw bosses.  Everything looks OK, so I insert the new O-ring and position the pump.  There is only one way all five screw holes line up, so you can't go wrong. Don't forget the thread sealant on the five screws. Tighten the screws in a star pattern, as is good practice. 

After I get the new pump mounted, I notice two more blue paint dots on it. 


Whew.  I hope they were really, really paying attention to details when this pump was built. 

I carefully slide the tank onto the front rubber mounts, and position the 2 by 4 under the rear of the tank again.  Remember to watch that the tank doesn't get away from you. 

I install the fuel line onto the new pump and slide the red lock piece home.  Don't force it.  It is designed to slide into its locked position only when the fuel line connection is fully seated.  I then plug in the electrical connector and connect the overflow hose. 

The seat bracket screws that hold the rear of the tank are next, then the plastic side covers on either side of the tank.  The seat is last to go on. 

To prime the fuel system, I turn the ignition switch to the on position to run the fuel pump for the initial three seconds it is programmed for.  I repeat that.  Then I press the starter button.  The engine fires up after cranking a few seconds getting the air out of the line between the pump and the injectors. 


I run the engine until the cooling fan cycles on two or three times.  It does not stumble.  Now for a test ride. 


I venture out with the idea that the pump might not have been the real problem.  If it wasn't, then I could stall somewhere again.  That wouldn't be good.  I pick a route to the south of nearby Greenville that is all secondary roads.  I ride along at a sedate clip and everything seems fine.  I reach the far side of Greenville, and decide to head north to Lake Lure and Chimney Rock, taking a leap of confidence that the problem is fixed. 

I don't particularly like to ride to these two places because they are very crowded spring through fall.  Today, it is not yet tourist season, so the traffic is light. 

I make it to Lake Lure and take a lunch break.  The bike has performed well so far.  I go on a little way to Chimney Rock, and then head toward home.  The temperature range today has been between 40 and 80 degrees, so he thermal effects on the pump ought to have been tested, too.  As I roll into the driveway -- under power this time, unlike last time -- I find that I have ridden 202 miles with nary a lick of a problem.

I'll call that a success.  It should be good for more than another 48,000 miles. 


I'm sure glad the pump didn't fail when I was miles from home either that first time or on my test ride. 
.
.
.

Monday, March 23, 2015

First Spring Ride on the Blue Ridge Parkway

.
March 16, 2015, just three days before the vernal equinox.  

I usually don't go far up the nearby Blue Ridge Escarpment in winter because there might be ice or sand on the roads.  But spring is coming quickly to South Carolina, and the days are mostly warmer.  We have had some in the 70s and 80s.  One of the evenings has been warm enough to sleep with the window thrown wide open.  The fresh air and the sounds of birds welcoming the new day were treats, both. 

Sounds like extra good riding weather to me. 

I decided to look and see if the Blue Ridge Parkway is open yet by consulting their real-time website.  It showed that it was not open toward the north at NC-215, the closest entrance to my house, but it was open north from US-276, which is further to the east of 215.

I decided that I would go for a spin and see what I could of the mountains.  I suit up, but with light insulation because it is in the mid-60s already.   It is nice not to have to bundle up so heavily for a change. 

I go up SC-135, then SC-8, and US-276.  There are a bunch of bicyclists laboring up the hill, so I have to be careful, especially because there are so many curves.  The sight distance is generally good on this road, so it is not too much of a problem avoiding them.  Most are smart enough to ride single file.  They appear to be part pf a group, probably the usual March training that London, Ontario, Canada-based coach Chris Helwig of Coachchris.ca conducts from nearby Table Rock State Park.  Many of their jerseys had the province name Ontario on the back, so that is likely the case.  They have better riding etiquette than most


There are some of the same group coming back down the hill, too.  They trust their skinny tires more than I would.  Look at that guy on the left.  He is just straightening up after a tight turn. 


276 goes past Caesars Head State Park, a place with a great overlook down the steep slope of the Blue Ridge Escarpment. As I pass the entrance, take a look at the beautiful clear sky we have this day. 


I don't stop at Caesars Head, because I want to get to the Parkway.  I continue on past YMCA Camp Greenville and Pretty Place, cross into North Carolina, and go until I see a sign for Dupont Forest.   I make a right on Cascade lake Road, then another right on Staton Road.  This second right is easy to miss, and the road almost immediately turns to gravel if you continue straight.  I miss it and have to turn around.

Is should tell you that there is another place to go that starts right about where you turn off 276 onto Cascade Lake Road.  It is Reasonover Road, just after the fire station on the corner, and leads to Green River Road, a gravel road that is passable on a street bike.  I went there in September of 2009, and one of my "dualsport-for-a-day" rides.  

Back to today's ride, it is said that the gravel part of Cascade Lake Road, is a good place to ride a dirt bike, but I have not ventured very far along it on my Ninja.

I stop at the new visitor center for a potty break. 


They have a few displays inside that describe the history of the park and available activities.  The Dupont Company had a plant here for some 30 years that made X-ray film.  The plant is gone, but the surrounding forest is a good place to sight see, hike, and mountain bike.  Just as there were a surprising number of bicyclists out on a weekday, there are a surprising number of people here as well. 

A lake near the visitor center, aptly named Dupont Lake, is quite picturesque,


but it has a tall fence around it and signs warning not to go near. 


I suppose there is some environmental problem.  Nevertheless, the view is pretty.  

I continue on through the forest, make a couple of lefts, and find myself on US-276 again.  I have bypassed the town of Brevard North Carolina.  It is usually busy, as it is a popular retirement town and tourist stop.  The annual Brevard Music Festival is held here. The highbrows flock to it. We'll have to go some time. 

I climb the continuing grade on 276, passing Looking Glass Falls and the Cradle of Forestry, both good places to stop

Another motorcycle, riding two-up and I get behind a young woman in the little red car who is going quite slowly. 


There is no passing on this road, so I stop for a few minutes to let her get ahead some.  That is effective for a while, but I catch her again nearer the Parkway entrance. 

She turns right onto it, and I have to do the same. 

I stop at the first overlook to the south of the entrance for a few minutes.  (To let the little red car get ahead again.)  A large sign says that the road is indeed closed in that direction at Black Balsam, where there is a road that provides access to the summit of 6214 foot Black Balsam Knob.  I decide to go that way for as far as I can, then turn back north to an exit near the North Carolina Arboretum not far from Asheville, NC. 

There are occasional spots where ice has fallen onto the road shoulder in the shaded rock cuts. 


I stop a few times, but the road is clear and there isn't much traffic, so I enjoy the ride.  The speed limit is 45, and that provides a good enough experience of the curves for me.  There might still be some ice or fallen rock, or sand on the road.  Besides, the fines for speeding are enormous. 

One other hazard is prevalent on the Parkway -- stopped motorists.  They are looking at the scenery or have stopped to take a picture in just the right spot.  I run across this idiot, stopped in the driving lane on a bridge so he can get out a take a picture. 


Going north, there are several tunnels to go through.  They are cooler inside, and, indeed, you must watch for ice in them even when the outdoor temperature is above freezing. 


Some of the tunnels are curved, like this one. 


Here is some of the pretty stuff I have seen today. 


Even with the trees and flowers still asleep, the views are great. Just stopping and listening to the wind in the trees is a peaceful pastime here. 

Soon enough, I reach the intended exit, and leave the Parkway.  I regret having to do this, because it is such a nice day to ride. I feel that way rather often near the end of a good ride

I fill up the tank, then head toward I-25, and US-25.  These are superslabs, and quite boring, but relatively quick. 


Here is the route for the day: 

Click here for an interactive map.
I have ridden almost 160 miles, on clear rods, in warm weather, in a wonderful part of God's creation.


Oh.  There is one event that occurred at the very end of this ride I have not described.  No, I didn't wreck, and I am safe, but it was a little worrisome.  I'll tell you about it next time.  
.
.
.

Friday, March 13, 2015

What I've Been Up To Besides Riding

.
Since I retired from the job, I have had the opportunity to expand my other activities quite a bit.  I won't say it has been easy to make the transition from working to retired, but I am working on perfecting the endeavor.

I find myself in three general modes that I have identified so far:
  1. Times when I can't think of anything to do, or want to get started on.
  2. Times when I feel that there is so much I can do and I want to do it all at once.
  3. Times when I still feel the pressure to get chores and tasks done -- like I did when I was working.  
Odd, all of them, but especially the last of the three. I gotta ditch that feeling.  I have time now to do justice to almost any task.  Pretty soon, I'll get into the swing of this thing. Maybe I need to pace myself better. 

I will say that I have had to keep a more comprehensive calendar of events than I used to. 


Before, I worked, and I came home.  Occasionally, I would have an evening or weekend activity that had to be remembered and required an entry on the docket.  Now, every day is different, so I have to study those little squares carefully to make sure I don't miss something. 

For one thing, the piano playing continues apace.  There seems to be a dearth of piano pounders who still play music from the first three quarters of the 20th century, and who play the old hymns.  ...and the old ladies at the places I play like to give hugs and sometimes kisses, too.  (I have to watch for their lipstick smudges, lest my wife become jealous.) 

I have also come to be of some help to my loving wife, like starting supper before she gets home from her work.  She has given me her secrets for making simple, but tasty, oven meals, and I have used them extensively.  Salmon and chicken breast are two of the best.  (No, I don't wear a frilly apron when I cook.  I do have certain standards.) 

I will admit that I had developed the beginning of a pot belly in the last couple of years, that affliction so common in middle-aged men.


I have always been skinny, and a belly isn't becoming to most guys, especially not to me.

So I cut down on the calories and have started being more active than I had been.  Certainly chores like trimming bushes and trees, and hauling off the detritus, cleaning gutters and sprucing up the house take more calories that sitting behind a desk a good part of the day. 

One other way I have bumped up the activity is by doing more hiking.  Not just the three miles or so around the neighborhood I had been walking every other day, but honest-to-goodness hiking.  One place to do this where the terrain is easy is the nearby Swamp Rabbit Trail.  Several maps of the trail are here

It mostly follows the former right of way of the Carolina, Knoxville and Western Railroad, nicknamed Swamp Rabbit years ago because it follows a swampy part of the Reedy River where there live swamp rabbits indigenous to the area. 

"Swamp Rabbit (Sylvilagus aquaticus)" by glenn_e_wilson - Swamp Rabbit. Licensed under CC BY 2.0 via Wikimedia Commons - http://commons.wikimedia.org/wiki/File:Swamp_Rabbit_(Sylvilagus_aquaticus).jpg#mediaviewer/File:Swamp_Rabbit_(Sylvilagus_aquaticus).jpg

The grading that would have to be done was minimized by following the river, thus making the right of way preparation less costly. 

Obligatory history/geography lesson:

The railroad was intended to link Augusta Georgia, through Greenville South Carolina, with the rich coal fields of Knoxville Tennessee.  Alas, there were financial troubles and lawsuits, so only 23 miles of the planned route were completed.  The northern end was at River Falls in northern Greenville County, on the Saluda River; in the same neck of the woods I reported riding in back in May of 2009.  Most of the railroad route is detailed on the Abandoned Rails website
A Western-themed park called Echo Valley operated for a brief period in the late 1960, near Cleveland South Carolina, and it had a railroad that used some of the old Swamp Rabbit right of way.  One website called Random Connections, written by local fellow Tom, describes the park and remnants of it (Posting 1, Posting 2, Posting 3).  The park's location was about here on the map, near where US-276 and SC-11 come together north of Slater-Marietta.   

Today, the 18.7-mile Rails-to-Trails Swamp Rabbit Trail has the same gentle grades suitable for railroad operation -- and that makes it an easy traverse on foot or bike.

So far, I have walked about 12 miles of the trail between south Greenville and Travelers Rest.  I have done this in several out-and-back chunks.  I hope to up the mileage of each hike soon. 

I also accompanied a couple of guides from the Spartanburg County Parks Department on the northernmost five miles of the Enoree Passage of the Palmetto Trail, from Sedalia Campground to Macedonia Lake. 

And there are plenty of other parks and waterfalls in the mountains to keep my hiking boots dirty for years. 

I may get out my old road bike and spruce it up, too. 


I have not ridden for a few years, but I might like to ride the length of the Swamp Rabbit some day.  Problem is, I need someone to take me to one end and pick me up at the other.  My sweet wife may volunteer if I ask her nicely. 


What do you think?  Any tips and pointers on how to make a go of retirement? 

.
.

Tuesday, February 10, 2015

GoPro

.
You have probably noticed some of the photos in my blog have part of the bike's cowling showing.  Like this:


Let me give you a clue as to why that is:

See that shadow on the left side of the bike?  (With the red circle around it, in case you missed it.)  That's what we are here to talk about today. 

You see, my wife gave me a GoPro HD Hero 2 for my birthday, year before last. 
 

For the longest time, I couldn't figure out a good way to mount it without using one of the adhesive mounts on my helmet or on the bike.  I didn't like the idea of using either, because the mounts are hard to remove, and the top helmet mount makes the camera act like a sail in the wind stream.

I finally came to the realization that I would have to pry my wallet open and get some other kind of mount.  After diligent study, I settled on a large suction cup mount to be attached to the plastic cowling of the bike.

AUCMT-301 Suction Cup Mount

I found a suitable place for it on the bike cowling, but was concerned that the mount would come loose after a period of time, so I suctioned it to the bike, and did my best to dislodge it by hand.  I couldn't do it without overstressing the plastic. 

I left it on for a couple of weeks, and it seemed to remain just as tight.  So far, so good.  Here is the mounting location, just below the "Ninja" lettering: 


I put the camera in the clear plastic case with the closed back that comes with the camera, and affixed some wire ties between the base of the camera case and the frame of the bike, just in case something let loose and came apart along the way.

Then I took a little trip with the camera running.  The video was fine, but the sound was disappointing.  The sealed case helps to reduce wind noise well enough, so that is not the problem.  The issue is that the vibration of the cowlings of the motorcycle creates a loud buzz at certain engine RPM.  The buzz is a well-known problem of the Ninja 650R, unfortunately. 

I have not fixed that yet, but I have taken several runs at calming the buzzy cowlings down in the past.  It will take a further concerted effort to find all of the places that hum and put some more foam rubber weatherstripping in each joint. 


Well less than a year after I got the little camera, I began to notice that it would not power on again when the battery needed to be changed.  Sometimes it would not power on at all, even the first time.  No matter what I did, it wouldn't work.  I tinkered with the spare batteries, and with the charger, and with the SD card in and out, and manipulated the shutter button in all manner of sequence with the on/off button, but to no avail. My camera was what they call "bricked" in England. 

By the time I came to that realization, the unit was out of warranty, so a Googling I went.  I found that MANY owners of this GoPro model had the same problem.  Website after website and forum after forum did not really give an answer: Only bits and pieces of possible solutions were found. 

So, here is what I did to make it work again: 

  • The article HD HERO2 Does Not Power On helped by describing how to power the camera on using a USB charger, but NOT using a USB cable plugged into a computer: You want a charger only.  Disconnect any BacPac accessories or cables from the camera and also remove the camera's battery and SD card.  With no battery in the camera, use the USB cable to connect your camera to a USB wall charger that outputs 5 Volts and 1 Amp or so.  Once connected to the charger, the red LED on the front of the camera should flicker.  Firmly press and release the Power button, and the camera should power on within a few seconds.  I had to do this several times before it worked. 
    My camera would still not power on with the battery in it after this was done, so onward..... 
  • I decided that the software in the camera needed to be updated.  After all, what did I have to lose?  The original software version that was loaded in the camera was HD2.08.12.70   (The version can be found in the file version.txt on SD card.)   The latest version of software as of today is HD2.08.12.312    This information is available on the GoProSoftware Update Release Information webpage
    To update, the software, I first tried to use the GoPro Studio program that is supposed to be a video editing tool that also helps with software updates.  It would not install on -- and in fact locked up -- my Windows XP computer, so I went to this page, Manual Software Update for HD HERO2 Camera
  • Next, reformat the SD card in the camera with the Delete ALL/Format function in the settings menu. See: Formatting an SD Card with the HD HERO2.  Remember that any data on the card will be lost. 
  1.  Power on your camera with the SD card inserted. (Using the USB charger, not a computer.)  You may have to do this repeatedly if the camera won't power on, disconnecting the charger between tries. 
  2. Press the front (Power) button repeatedly until you see the wrench icon on the camera’s screen.
  3.  Press the top (Shutter) button one time.
  4.  Press the Power button repeatedly until you see “MORE”.
  5.  Press the Shutter button one time to select MORE.  Next, you’ll see a trashcan icon.
  6.  Press the Shutter button one time to select the trashcan icon.
  7.  Press the Power button until “ALL/Format” is highlighted.
  8.  Press the Shutter button one time to select “ALL/Format”.
  9.  Press the Power button until “Yes” is highlighted.
  10.  Press the Shutter button one time to select “Yes”.  Your camera’s LED and the trashcan icon will blink to indicate that your SD card is being reformatted.
  • Using a computer, download the HD2 software .bin file.  The location of the newest HD Hero 2 software is located here.  Don't open the file once it downloads.  Instead, place the file in the root directory of the SD card. 
    Insert the SD card into the camera while the camera is powered Off. 
    Hold the Shutter button down on the camera, and press the Power button one time. The camera will power on and show a video camera icon.  (I had to do this many times before it would work.  In my case, I powered the camera with the charger, not the battery.)  While STILL holding the Shutter button, press the Power button 3 more times. The camera software update screen should show again.  While the camera is updating itself, you'll notice that it will power itself OFF/ON up to two times within the span of 3 minutes during this process. If the camera stays powered Off for longer than 20 seconds, power it back On. The camera will continue to update itself.  (I had to power on the camera manually.)  If you see the camera software update screen for longer than 3 minutes, remove and reinsert the battery.  (DO NOT remove or reformat the SD card.) 
    Power on the camera by pressing the Power button one time. In some cases, you may need to repeat this step.  The software update should complete in about 3 minutes. 
    Once the software update completes, the camera will automatically start up into video mode.
  • To verify that the software update installed properly, power Off the camera, then power On the camera. Once you do this, the software update will complete if it hasn't yet, and you will see the camera go into video mode.  Once it starts up into video mode, you'll know that the software update is complete. 
After that, my camera powered up OK and I was able to take some test videos and photos.  From then on, it has worked perfectly.


Fringe Benefits:

The software update solved the no-power-on problem, but it also installed a feature that helps with editing and better playback functionality on slow WiFi networks.  The new feature causes the camera to put not only the video file with the .MP4 extension, but also .THM and .LRV files.

.THM files are Thumbnail video files that are used to display a thumbnail image of the first frame of the video.  Rename the extension to .JPG from .THM in order to open it up as an image and view it on your computer.

.LRV files are Low Resolution Video files.  If you rename the extension to .MP4 instead of .LRV, it will be a lower quality version of the original video you shot.

See this and this reference.

The other purpose of .LRV files is to allow quicker and more headache-free video editing on your computer, which may not be powerful enough to handle high resolution video files. Refer to this thread for more info on how you can use .LRV files to edit your GoPro footage quicker


My First Posted Video:

I had no experience editing and posting a video, so back to Google to find something cheap, err...inexpensive that will load the .MP4 files that camera records.  Neither Windows MovieMaker nor Virtual Dub would load that file type. 

I found Wondershare video editor.  It is fairly easy to learn -- a good thing for me. 
The trial version of the software overlays an unfortunate Wondershare watermark through the entire video.  I will need to buy a license if I am going to continue to use it.  It costs $19.95 for a year and $39.95 for an unlimited time. 

I started with an old video that I had taken back on December 30 of 2013, while riding US-178 from Rocky Bottom to Pickens, SC.  That is one of the favorite twisty roads around here. 

It was a pretty day, and the road was clean. 


I edited in some titles and edited out some straight-road sections in the video. 

But, the annoying cowling buzz is in the audio.  (Turn the volume down to minimize the irritation.) 


This is the route, starting at the top: 

Click here for an interactive map. 


See what you think:

.
.
.
.
.

Tuesday, January 20, 2015

Empty Roads, Wandering About...and Root Beer!

.
Since I have retired from work, I have had the opportunity to go out riding on weekdays when I would previously have been hard at work in the office (possibly daydreaming of being out riding). 

These weekdays are not only a new time to ride for me, but they have an unexpected advantage: There is hardly anybody on the roads. 

All right!

As long as I avoid commuting hours and school start and end times, there is almost no one on the road once you get out of the city.  Maybe a few more heavy trucks, but certainly fewer cars. 


Since I have only about thirteen miles to escape into the mountains of the Blue Ridge Escarpment from home in the metropolis of Easley, it has been great. 

There are certain advantages of being unemployed -- err, retired -- after all. 

I thought that this low traffic situation was in part due to the cold winter weather, but I went out today when the temperature was in the 60s, and found the traffic to be light just the same.  (We're a bunch of pansies here in the south when it comes to cold weather.  Anything under around 50 degrees is downright "frigid" according to most natives.  So, they stay home to avoid the chance of dying of a chill outside.) 


I have also noticed that I am taking more rides on the scooter where I am simply wandering around looking for roads I have not ridden and scenery I have not seen.

I took notice of this as I was looking at some of the tracks saved by the GPS keeps as I ride. A few of them are downright piles of spaghetti.  Look these over:


Twisted, yes?  Actually, to be perfectly honest, some of the time I was lost, if you define that as not knowing either where you are or where you are going.  I fit that description on a lot of these. 

Thank goodness for the GPS to get me back home


[OK, but what about the root beer, Bucky?]  

Oh.  I almost forgot.  Let me explain.  I have been a drinker of root beer for some years now.  It is the only soda pop worth imbibing.  If it isn't root beer, it doesn't merit a second glance, in my view.  I turn down anything else offered.  Politely, though, you can be certain. 

Now that I have a little more time to take rides on the motorcycle, I find that I can quaff a bottle of root beer afterward as I relax in my easy chair, and gain the ultimate in satisfaction -- recollection of an enjoyable time out on the roads, and the sweet, fragrant taste of my favorite drink.


Mmmm, mmmm, good.

Come ride with me some time, and I'll offer you a fine bottle of my favorite brew.  


Root beer, of course!
.
.
..